Localization Editor
The Localization Editor is a game feature that allows users to translate the game into another language and contribute to the ongoing VTOL VR game translation efforts. It requires no texturing or file editing skills, as the game provides the editor, or you can use a spreadsheet application, the files for Localizations are stored as Comma-Separated Values files (.csv).
Accessing the Files/Accessing the In-Game Editor
It is possible to access the localization editor without SteamVR detecting an HMD the same way the Map and Mission Editors would be through the desktop. The button to access the editor will be located on the bottom left of the Main Menu, similar to how the Map Editor can be accessed. Alternatively, the files themselves can be found in the following area within Steam's local files:
steamapps\common\VTOL VR\Localization\[LOCALIZATION NAME]
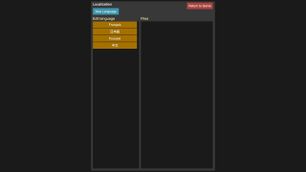
Localization Menu
Upon opening the localization menu, you will be met with a few options. You will find the option to return to the Main Menu in the top right ("Return to Game" button).
New Language Menu
Clicking the "New Language" button opens a new menu. Here, one of the preset languages can be selected in order to create a folder and start to localize, or create a custom one. Clicking the language you wish to localize will create a new directory and the files necessary inside; an external spreadsheet editor may be utilized for this if desired. This button will also open the Localization Menu. To create a custom language, enter a name in the box that states: "Enter custom language code..." and click the "Custom Language" button. Mind that the title only supports alphabetical characters; only a-z are allowed and no spaces may be included.
Choosing a Language to Edit
Upon clicking on a language in the Localization Menu, all of the .csv files inside the folder will be shown. To start editing one, click on it.
Editing a File
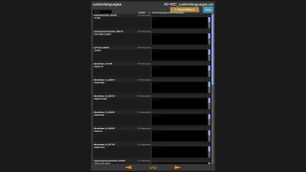
Clicking on a file to edit opens a new page, which shows you every entry to edit on the left (in English) and on the right (in the desired language).
Each entry (represented each by a separated gray box) includes the entry's file name, the entry's corresponding text string below, a box where the translation of said entry will go and finally, a category on the top center of every box. Certain categories are important to pay attention to, as certain entries in those categories need to keep the same amount of characters and/or format (such as entries that will appear on GUI, the MFDs, the MMFDs, etc.), make an educated guess as to which require that special attention and/or test to make sure they fit in their allocated space.
Additionally, there are arrow buttons at the bottom center of the screen that are used to navigate through each page (showing 20 entries per page). Finally, there is a search box on the top left of the menu, allowing you to search for specific entries to edit. Always save regularly to prevent loss of progress.
.CSV File Format
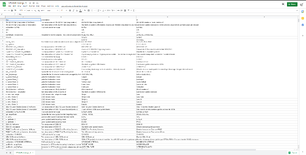
This section is a quick run-down of what column does what in the CSV files in case you wish to edit directly with a spreadsheet editor.A language file must first be created through the Editor before it can be seen here.
- The first column, named "Key", is the internal name for all of the entries;
- The second, named "Description", is a quick description of the entries;
- The third, named "en", is the entry you will need to translate in English; and
- The fourth, named "XX", where XX = the first 2 letters of your localization, will be the translated entry.
Publishing the Localization
In order to publish your localization, you will need to join the official VTOL VR Discord server, go to the #vtol_localization channel, drop a compressed file with your localization, and let the developer know you have completed the localization.


