Map Editor
The Map Editor is an Editor program used for making maps in VTOL VR for use in the Mission Editor.
Main Menu
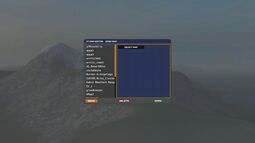
Upon loading up the Map Editor, two options will be available: New Map and Open Map. New Map opens up the setup page for generating new maps while Open Map allows creators to access saved maps for further modification.
New Map
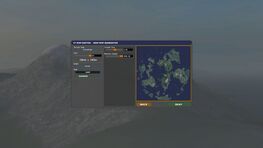
The New Map UI is where new map bases (unaltered terrain) are configured for generation. The options chosen here cannot be adjusted after they are set. There are several different parameters that can be tweaked to change the map's properties:
- Terrain Type: Determines the type of map generated. Can be toggled between three different modes:
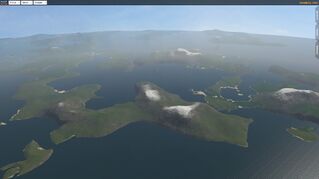
- Archipelago: Creates a water-based map with islands of varying size and density.
- Mountain Lakes: Creates a mountain-based map with large mountain ranges and scattered lakes. No water border is present in this type.
- HeightMap: A more complex type that allows for the generation of specifically-designed maps. More information in the HeightMap section below.
- Size: A slider option that determines the size of the map generated in square kilometers. Can be adjusted between 24 km by 24 km (slider value 8) and 196 km by 196 km (slider value 64).
- Biome: Sets the biome of the map, which affects the style of the terrain. There are three Biome options available:
- Boreal: Grasslands and scattered forests with snow-topped mountains. Trees are placed within the forest areas (patches of dark-green grass).
- Desert: Barren desert with sand fields and rocky mountains. Dead trees are scattered throughout the area.
- Arctic: Snowy tundra environment. No trees are generated, which could save loading time in certain setups.
- Seed: The map's Seed value used for determining the generation of the terrain (default value: seed). This value can be copied down along with the config options to allow the map base to be shared. This value cannot be retrieved after the map's generation. There is also a Random button available for generating a random Seed value for your map.
- There are also two other sliders available for determining how your map is generated:
- Islands[sic] Size: Determines the size of the islands generated in your map. In the Mountain Lakes Terrain Type, this determines the frequency of lakes in your map.
- Mountain Height: Determines the maximum height ceiling for the mountains generated. At its maximum setting, it could result in mountains being generated with unnaturally flat peaks, giving off a mesa-type effect. This is due mostly in part to limitations in the game engine.
HeightMap
This Terrain Type option allows users to import their own Height Maps for configuration. The Seed option is replaced with a few new parameters for more adjusting the map's specifications to match the chosen Height Map:
- Border Type: This determines the border around the map. It is used for differentiating between different map types in the game. Three options are available:
- Water: The map is bordered by water on all sides. Used for creating island maps.
- Hills: The map is bordered by terrain on all sides. Used for creating landlocked maps.
- Coast: The map is bordered by land on all sides except one. This option allows for the creation of coastline maps. The coast can be set to one of four sides: North, East, South, or West. Everything beyond the direction your coastline is set to will be water, while every other border will have further land generated beyond it.
Open Map
This area is for opening previously-generated maps for modification. The game's preset maps, such as CostaOeste and TestMapAlpha, will also be available for use through this area. The map of Akutan, VTOL VR's "default map," is not accessible through the Map Editor though. It was designed individually and well before the Map Editor existed, and therefore is not compatible with it.
Editor Overview
The Map Editor software contains a number of terrain tools for adjusting the terrain and adding in objects. Players can move around with the WASD keys and adjust the camera angle by holding right click and moving their mouse. There are three "Tabs" available in the top margin for adjusting a Map's metadata:
- File
- Save: Saves your Map as a file for later access.
- Quit: Returns to the Map Editor's main menu.
- Edit
- Map Info: Determines the Name and Description of your map, which show up when the Map is selected in the Open Map area.
- Steam
- Upload: Uploads your Map to the Steam workshop. Workshop page info can only be configured in the Workshop page itself after the Map is uploaded. This button is also used for updating the Map file on the Workshop after being uploaded.
For Map adjustment, there are three extra tabs in the right-hand margin.
Objects
This tab is used for manually adding objects into the Map. It is used mainly for adding Airbases (in the Bases category) and Docks (in the Coastal category) into a Map, but it can also be used to manually add in buildings as an alternative method to the City Painter Brush (see below).
Roads
This tab is used for inserting roads into a Map. There are two road options available: 2-Lane Roads and 4-Lane Roads. Roads are placed down as nodes that are automatically connected together. Roads are constructed based on three nodes placed down:
- Base node: This determines the starting point of your road strip.
- Midpoint node: This determines the curvature of your road.
- End node: This determines where your strip ends.
End nodes can be connected up to Base nodes to extend roads. Roads can also branch out from existing ones to create junctions. A road's height can be adjusted with Ctrl+Scroll, allowing bridges to be created. You can also to cancel the road creation by pressing space.
Terrain
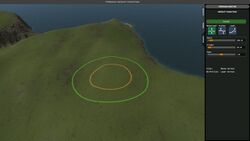
This tab contains two Brush tools for modifying the Map. There are two Brushes available:
- Height Paint: This Brush is used for adjusting the shape of your Map. Holding Left Click raises the terrain while Shift+Left Click lowers terrain. There are three sliders available for adjusting the brush's behavior:
- Radius: Changes the radius of the Brush for adjusting larger swaths of terrain.
- Strength: Determines how quickly terrain is adjusted. Lower values allow for more fine-tuned terrain adjustments.
- Shape: Changes the "Shape" of your brush. Lower values make the Brush flatter while higher values make the brush much sharper towards the middle.
- City Paint: This Brush is used for placing down buildings in bulk for adding cities and towns into a Map. Holding Left Click adds in cities while Ctrl+Left Click removes cities. It works similarly to the Height Paint Brush, having the same Radius, Strength, and Shape options available, but it also has a range option available for determining the type of City painted down. The roads placed down in between buildings with this tool cannot be automatically connected up with the Roads placed down with the Road tool.


